
Grout for Shower Tiles: Compare Epoxy and Cement Options
The grout choice is only half the result; a preventable installation mistake can undermine it. The best grout for shower tiles is usually epoxy when water and stain resistance matter most; cement grout remains a workable option if you’re prepared to seal and maintain it. Epoxy doesn’t need sealing, while standard cement-based shower grout should be sealed annually. Shower inside corners need 100% silicone, not grout.
That gives you the quick answer, but the right choice also depends on joint width, maintenance, and the finish you want. Durability matters in a wet area, but epoxy and cement grout differ in how they’re installed and cared for over time.
This comparison covers epoxy, standard cement, polymer-modified cement, and urethane grout, along with sealing and routine cleaning. It also explains common grouting mistakes that can cause cracks or let water behind tile, helping you weigh performance and maintenance, not just color.
Table of Contents
Does Epoxy Grout Need to Be Sealed?
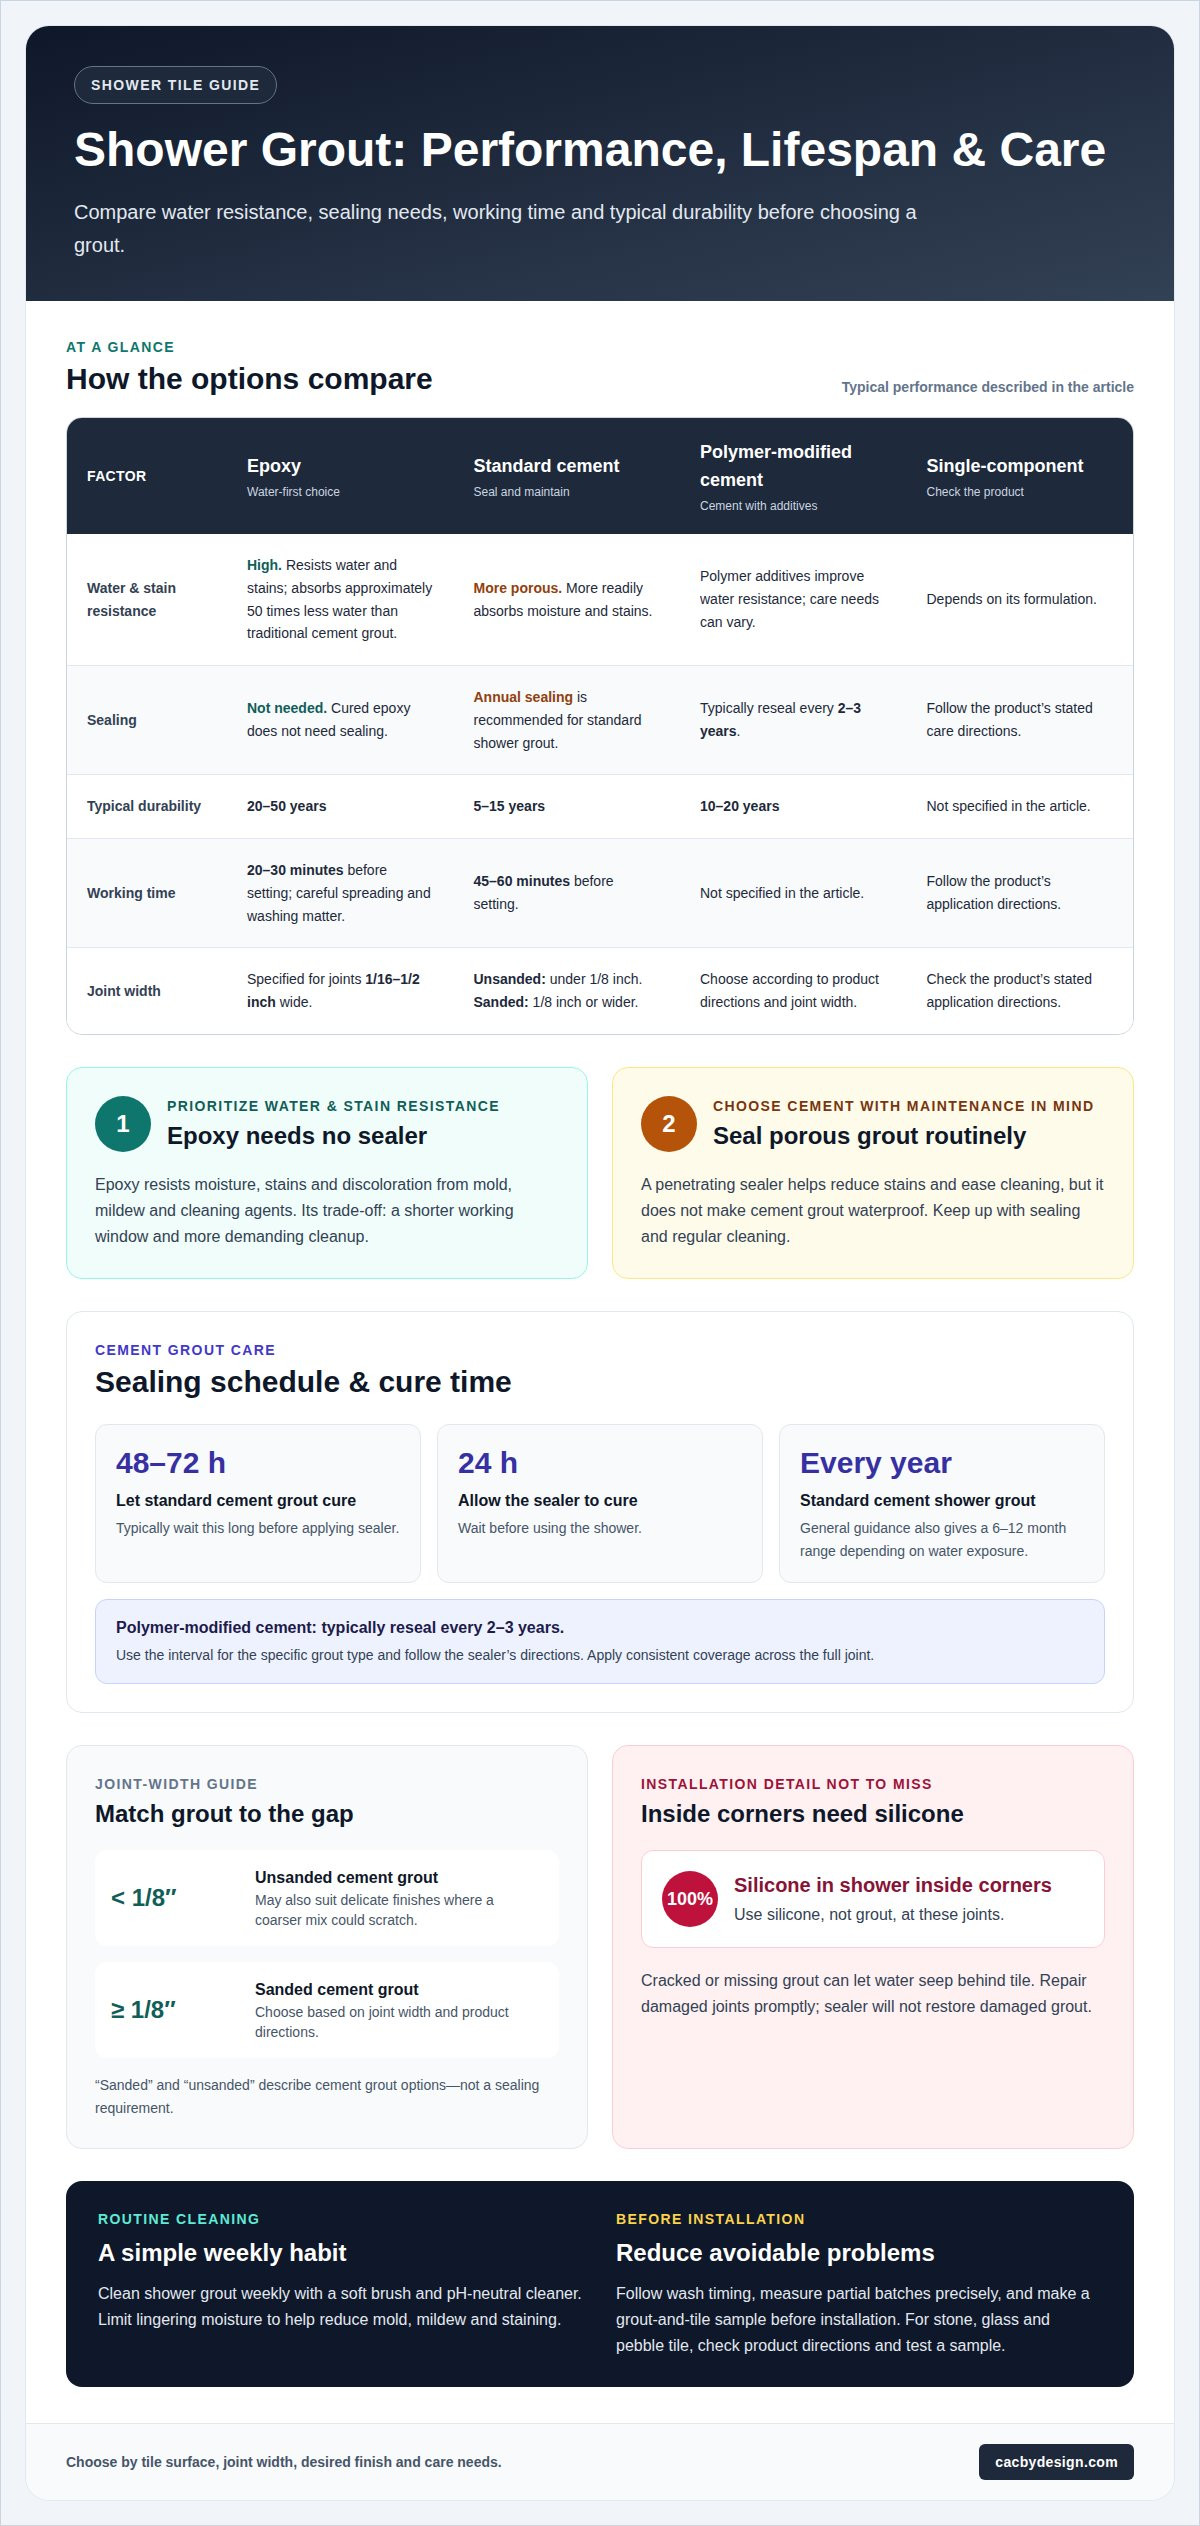
Epoxy grout doesn’t need sealing because its cured surface resists water and stains. It absorbs approximately 50 times less water than traditional cement grout and resists discoloration from mold, mildew, and cleaning agents. To reduce mold, mildew, and staining, clean shower grout weekly with a soft brush and pH-neutral cleaner, and limit lingering moisture. According to the National Institute for Occupational Safety and Health, bathroom ventilation was left on while showers were in use.
Durability is another advantage: epoxy grout has a typical lifespan of 20-50 years, compared with 5-15 years for standard cement grout and 10-20 years for polymer-modified grout. The trade-off is installation time. Epoxy grout can set quickly, so spreading and washing may require careful timing. That shorter working window can make epoxy harder to apply cleanly.
“Sanded” and “unsanded” describe cement grout options, not a sealing requirement. Joint width guides the choice: unsanded grout is recommended below 1/8 inch, and sanded grout at 1/8 inch or wider. Epoxy grout offers another option across its specified joint range.
For more consistent color, measure partial batches carefully and make a grout-and-tile sample before installation. Epoxy resists moisture and stains, but sets quickly and can be demanding to clean up. Cement grout allows a longer working window, but plan for sealing and regular cleaning.
Conclusion: What’s the Best Grout for Showers?
The best grout for shower tiles depends on the tile surface, joint width, and desired finish. Compare these factors before choosing a grout type or color.
Grout by Tile Type
Porcelain and ceramic tiles offer a straightforward starting point, but joint size and product directions still matter. Stone, glass, and pebble tiles vary in finish, shape, and spacing, affecting application and cleanup. Pebble layouts, for example, have irregular joints rather than a consistent grid. Follow the tile and grout manufacturers’ instructions, and test a sample before installation.
Unsanded Grout for Delicate Tile
Unsanded grout suits joints under 1/8 inch and may suit delicate finishes where a coarser mix could scratch the surface. Sanded grout is recommended for joints 1/8 inch or wider. For polished stone or glass, match the product to the tile’s finish and test a sample first. The best grout for shower tiles is compatible with both the material and joint.
Grout Color Choices
Color affects how tile patterns look. Iron grout with glossy white subway tile creates contrast, while Frosty grout with blue subway tile makes a lighter pairing. Smoke Gray against a white octagon-and-dot floor emphasizes the pattern. Judge color beside the actual tile, not from a powder sample alone. Make a grout-and-tile sample before choosing.
For a traditional layout, match joint width to the recommended sanded or unsanded grout, then consider the tile’s finish and care needs. Glass, natural stone, and pebble designs call for close attention to product directions and sample results. A premium tile doesn’t automatically require epoxy: the right choice depends on the surface, joints, and shower conditions. Prioritize compatibility, then compare color and maintenance.
Grout sealing and reapplication frequency
Cement-based grout is porous, so sealing helps reduce stains and makes wet shower joints easier to maintain. Repair cracked or missing grout promptly, since gaps can let water seep behind tiles. Replace grout when damage extends beyond a small repair and the joint no longer forms a continuous surface.
Cement-Based Grout Porosity
Traditional Portland-cement-based grout absorbs more moisture and stains more readily than less porous types. In a shower, repeated exposure to water makes routine sealing part of its care. A penetrating sealer helps reduce stains and ease cleaning, but it doesn’t make cement grout waterproof. Polymer additives may change some of cement grout’s properties, so its care needs can vary.
Sealing Cement Grout
Allow standard cement grout to cure for typically 48-72 hours before applying sealer. Then give shower grout sealer 24 hours to cure before using the shower. Follow the sealer’s application directions across the full joint, maintaining consistent coverage. Skipping a section can leave that area more exposed to water and staining.
Frequency depends on grout type and water exposure. Standard cement-based shower grout should be sealed annually. General guidance also calls for reapplying grout sealer every six to twelve months, depending on water exposure. High-performance polymer-modified cement grout typically needs resealing every 2-3 years. These intervals differ because the grout’s composition changes how readily it absorbs moisture. Use the interval for the specific grout type rather than treating every cement-based product as identical.
For an older shower, inspect joints for visible cracks, gaps, or missing grout. Address those defects promptly instead of relying on another coat of sealer; sealer won’t restore damaged grout. If deterioration runs along multiple joints, replacing the affected grout restores continuity more effectively than patching isolated spots. Keep the shower out of use for the stated 24-hour sealer cure period, then resume regular cleaning to limit buildup.
Common shower grouting mistakes
Even a suitable grout can fail when installation details are overlooked. In showers, pay close attention to corner joints, wash timing, and damaged grout, as each can affect the tiled surface.
Grouting inside corners: Use 100% silicone, not grout, at wall-to-wall and wall-to-floor corners. Those changes of plane can move differently from flat tile surfaces, making rigid grout prone to cracking.
Ignoring cracks or gaps: Address damaged joints promptly. Cracks and missing grout can let water seep behind tiles, so another coat of sealer isn’t a substitute for repairing the joint.
Missing the wash window: Follow the grout manufacturer’s wash timing during installation. Washing too early or too late can compromise the finished surface, while rushed cleanup can leave residue on tile.
Choosing by strength alone: A polymer-modified grout can improve cement grout’s water resistance, but it doesn’t remove the need to match the product to the joint and installation. Check the grout directions before applying it to shower walls or floors.
Ventilation also helps keep a shower environment drier. The National Institute for Occupational Safety and Health notes that bathroom ventilation was left on throughout the period when showers were in use. Pair airflow with weekly cleaning using a soft brush and pH-neutral cleaner to remove buildup from grout surfaces.
For a durable result, use this sequence: confirm the grout suits the tile and joints, keep grout out of inside corners, follow the specified wash timing, and repair cracks quickly. These steps target avoidable installation and maintenance failures without relying on sealer to solve every problem. If you’re planning a bathroom update, plan your bathroom remodel with those shower details in mind.
Countertops and Cabinetry By Design: Tile Backsplashes
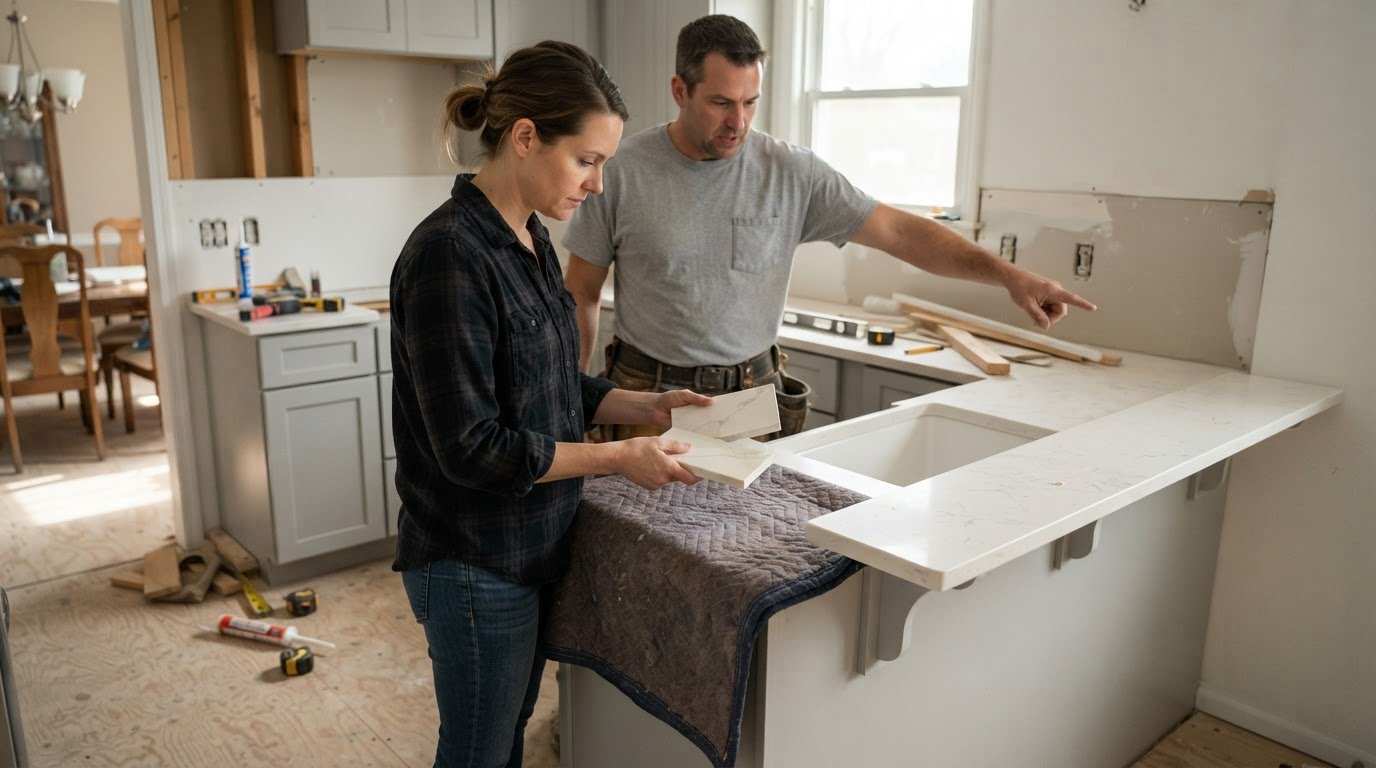
Countertops and Cabinetry By Design can coordinate tile backsplashes and countertop choices as part of a kitchen or bathroom remodel. Turn to the team when updating surfaces and planning a backsplash to complement marble, quartzite, or quartz countertops. Tile layout, grout color, and surface selection all shape the finished look, so consider them together.
A grout choice for a shower doesn’t determine the right grout or design for a backsplash. The tile, joint, and setting conditions differ, and each project needs choices suited to its own materials. For a cohesive room, align the backsplash palette with the countertop’s color and pattern, then consider how grout lines frame the tile. Contact Countertops and Cabinetry By Design to discuss your tile backsplash and countertop plans.
Plan the Next Surface Decision
Treat grout as one part of a broader materials plan. For a bathroom or kitchen update, consider how tile backsplashes and countertop colors will work together across the room. The best grout for shower tiles depends on the specific tile and installation; surrounding surfaces call for their own material and design decisions.
Countertops and Cabinetry By Design offers marble, quartzite, and quartz countertops. Coordinating these surfaces with a tile backsplash helps create a deliberate palette instead of disconnected choices. Bring your preferred tile, grout color, and countertop direction into the same design conversation so each finish has a clear role and the space feels cohesive.
Ready to shape the next step of your remodel? Start a conversation with Countertops and Cabinetry By Design about countertop and backsplash planning. A thoughtful material plan can turn practical choices into a space that feels distinctly yours.
Frequently Asked Questions
What type of grout is best for shower tiles: epoxy, cementitious, or urethane?
Epoxy suits projects where moisture and stain resistance are priorities; cementitious grout works when sealing and ongoing care are acceptable. Urethane grout offers flexibility to accommodate minor tile movement, which can reduce cracking risk, but takes longer to cure. Compare the tile, joint size, cleanup demands, and expected maintenance before choosing. Follow the product’s application directions.
Is epoxy grout worth the extra cost for a shower?
It can be worth the added expense if reduced water absorption, stain resistance, and less sealing are priorities. Epoxy grout costs 3-5 times as much as standard cement grout, so weigh its upfront cost against the maintenance you prefer. A shower with frequent use may make its performance appealing, while a tighter project budget may favor cement grout and a consistent sealing routine.
What grout is best for shower floors and walls?
Choose grout for each tiled surface based on its material, joint dimensions, and exposure. A pebble-tile shower floor may have irregular joints, while a wall of uniform ceramic tile may have consistent spacing. Make sure the grout suits both the tile and joint, and account for the floor layout when estimating application and cleanup work.
What grout joint width determines sanded versus unsanded grout?
Use unsanded grout for joints under 1/8 inch and sanded grout for joints 1/8 inch or wider. That means a joint exactly 1/8 inch wide falls into the sanded category. Measure the actual gap, not just the spacer label, because tile edges and placement can change joint dimensions. For delicate tile, confirm the grout is compatible with its finish.
How much does shower grout cost per square foot in the United States?
There isn’t one reliable per-square-foot figure for every shower. Material, joint width, tile size, floor layout, and installation conditions all affect the grout quantity and work involved. Epoxy costs more as a material than standard cement grout, but an accurate project estimate also depends on the tiled area and required preparation.
How do you choose a grout color for shower tile?
Choose a contrasting color to make a tile pattern stand out, or a closer match for a quieter, more continuous surface. Dark grout against white tile, for example, emphasizes the joint grid, while a pale shade softens it. Consider the walls and floor together, since different grout colors can make a bathroom feel visually segmented rather than coordinated.

Comments